최근 프로젝트에서 사용자용 모바일 웹앱 , 그리고 어드민용 웹 개발을 진행하게 되었다. 최종적으로 두개의 war 파일을 배포해야 하기 때문에 멀티 모듈을 사용하기로 하였다.
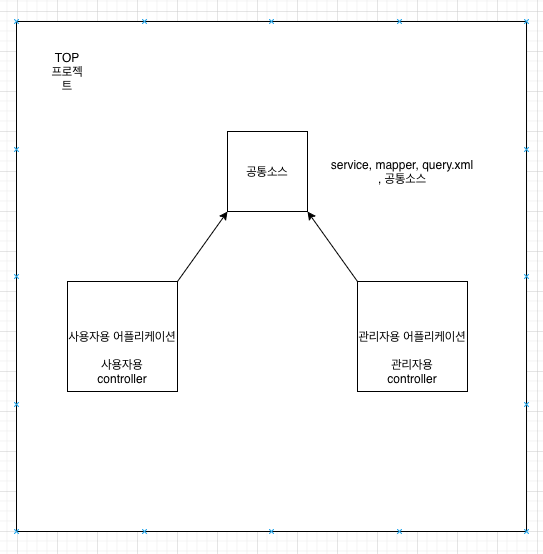
이번에 진행한 멀티 모듈 구조는 간략하게 아래와 같다.
-
사용자용 어플리케이션, 관리자용 애플리케이션인 각 서비스의 시작점인 controller를 생성한다.
-
각 어플리케이션 컨트롤러에서는 공통 소스(core)에 있는 서비스를 호출한다
그럼 위 기준으로 프로젝트를 생성하고 모듈을 추가해보도록 하겠다.
IDE는 IntelliJ를 사용하였다.
1. TOP 프로젝트 생성
File -> New -> New Project 선택
Maven 선택후 Next
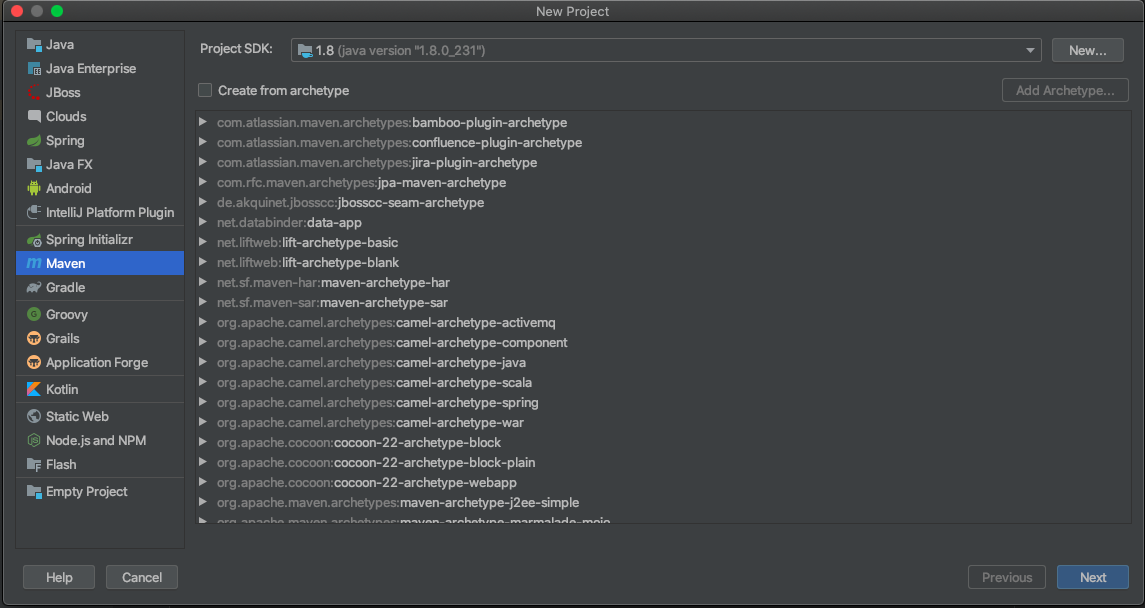
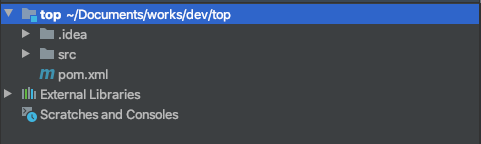
프로젝트명 입력후 Finish

아래와 같이 프로젝트가 생성된 것을 확인한다.
2. Module 생성
프로젝트선택 우클릭-> New -> Module 선택
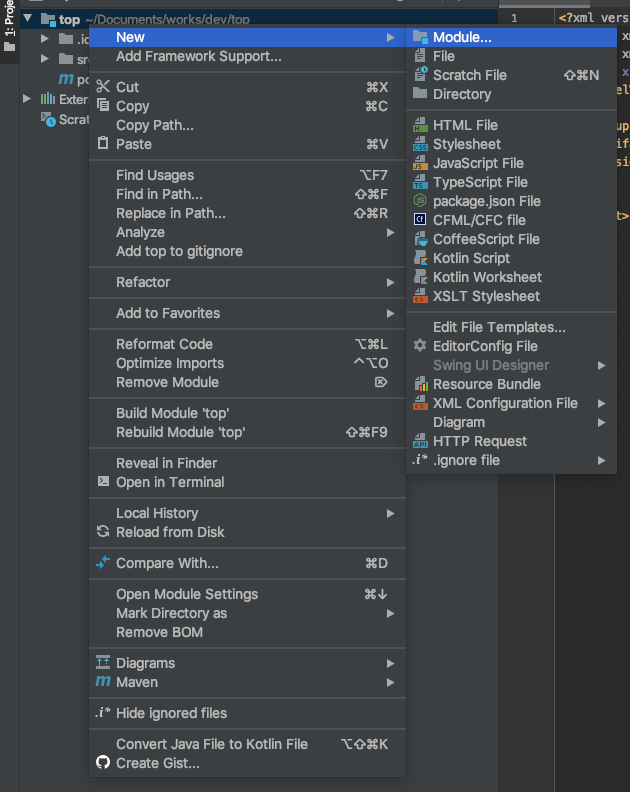
Maven 선택 후 Next
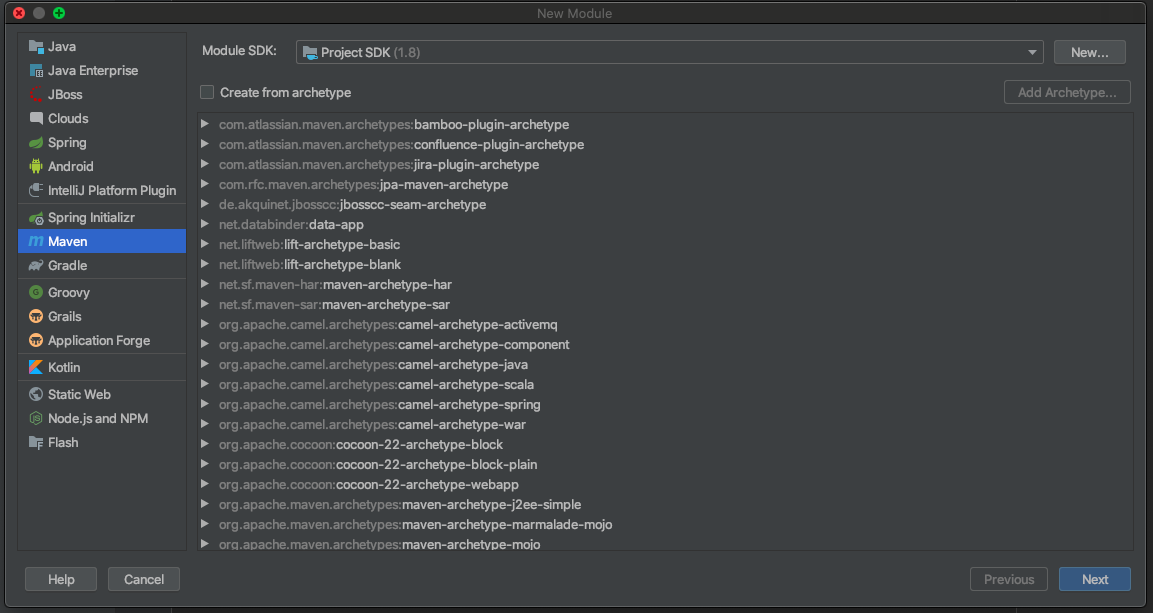
Module 명 입력 후 Finish
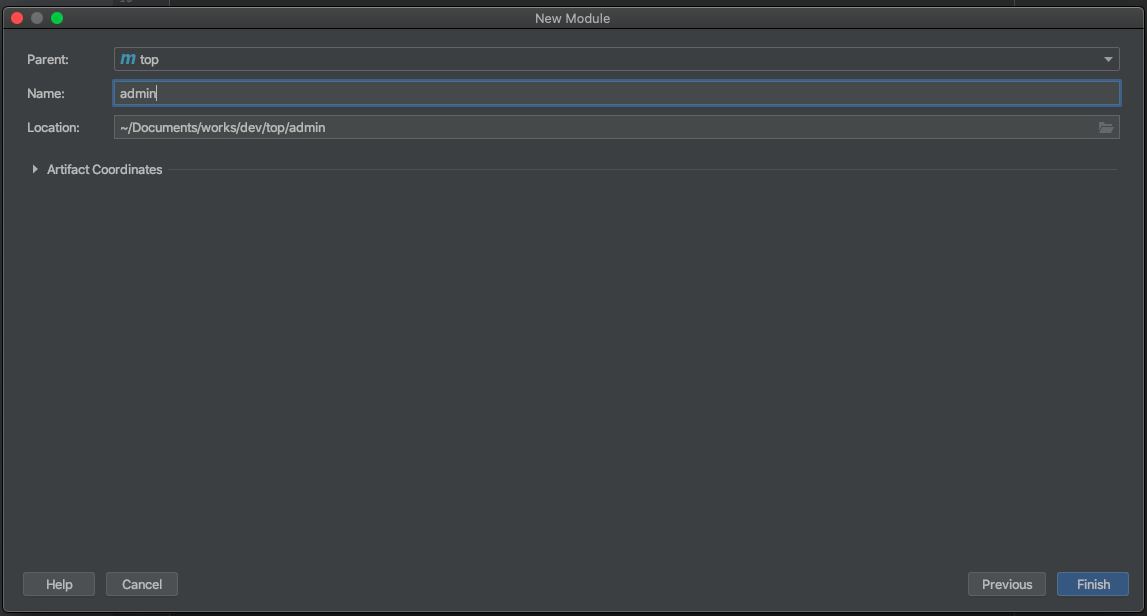
위 사진을 보면 Parent 로 top 이 선택되어있으며
Name 에는 의미상 맞는 하위 모듈명을 적으면 된다.
이제 동일한 방식으로 모듈을 2개더 추가해보겠다.
모듈명은 admin, core, front 로 하였다.
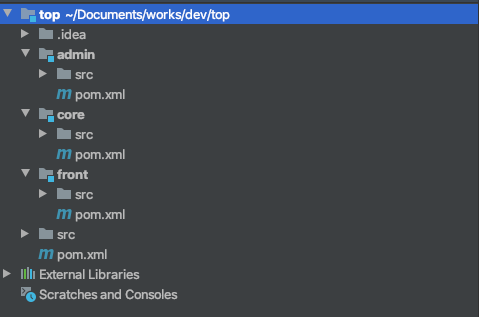
위에서 설명했듯이 admin과 front는 각각 독립된 모듈이며 core라는 공통 모듈을 참조하게 된다.
하위 모듈에는 모두 pom.xml 이 생성되어 있는데
<parent>
    <artifactId>top</artifactId>
    <groupId>org.example</groupId>
    <version>1.0-SNAPSHOT</version>
</parent>
위와 같이 parent를 지정하고 있는 것을 확인할 수 있다.
이제 admin 과 front 모듈에서 core 모듈을 참조할 수 있도록 수정해보자.
3. 샘플 소스 작성
core/src/main/java/CoreService.java
public class CoreService {


    public String hello () {
        return "hello core service";
    }
}
간단하게 서비스를 호출하면 문자열을 리턴하는 메서드를 추가하였다.
이제 admin 과 front의 pom.xml 에 core dependency 를 추가한다.
<?xml version="1.0" encoding="UTF-8"?>
<project xmlns="http://maven.apache.org/POM/4.0.0"
         xmlns:xsi="http://www.w3.org/2001/XMLSchema-instance"
         xsi:schemaLocation="http://maven.apache.org/POM/4.0.0 http://maven.apache.org/xsd/maven-4.0.0.xsd">
    <parent>
        <artifactId>parent</artifactId>
        <groupId>org.example</groupId>
        <version>1.0-SNAPSHOT</version>
    </parent>
    <modelVersion>4.0.0</modelVersion>


    <artifactId>admin</artifactId>


<!--    core dependency-->
    <dependencies>
        <dependency>
            <groupId>org.example</groupId>
            <artifactId>core</artifactId>
            <version>1.0-SNAPSHOT</version>
            <scope>compile</scope>
        </dependency>
    </dependencies>


</project>
core dependency 주석 밑에 있는 내용을 추가하면 된다.
이제 admin 과 front에서 core의 service를 호출해보겠다.
admin/src/main/java/AdminController
public class AdminController {


    public static void main(String[] args) {


        CoreService coreService = new CoreService();
        System.out.println(coreService.hello());
    }
}
main 메소드를 실행시키면 “hello core service”라는 메시지가 출력된다.
만약 core dependency 를 추가하지 않을 경우 에러가 발생한다.
그렇다면 개발에 필요한 maven dependency 는 어디에 추가해야 할까?
만약 각 모듈에서만 사용할 목적이라면 해당 모듈 pom.xml 에 추가하면 된다.
그게 아니라면 top 프로젝트의 pom.xml 에 작성하면 하위 모듈에서 사용할 수 있다.
이번에는 최상위에 있는 top 프로젝트의 pom.xml 에 spring-boot 관련 dependency를 추가해보자.
<?xml version="1.0" encoding="UTF-8"?>
<project xmlns="http://maven.apache.org/POM/4.0.0"
         xmlns:xsi="http://www.w3.org/2001/XMLSchema-instance"
         xsi:schemaLocation="http://maven.apache.org/POM/4.0.0 http://maven.apache.org/xsd/maven-4.0.0.xsd">
    <modelVersion>4.0.0</modelVersion>


    <!-- springboot parent -->
    <parent>
        <groupId>org.springframework.boot</groupId>
        <artifactId>spring-boot-starter-parent</artifactId>
        <version>2.3.3.RELEASE</version>
        <relativePath/> <!-- lookup parent from repository -->
    </parent>


    <groupId>org.example</groupId>
    <artifactId>top</artifactId>
    <packaging>pom</packaging>
    <version>1.0-SNAPSHOT</version>
    <modules>
        <module>admin</module>
        <module>core</module>
        <module>front</module>
    </modules>
    <dependencies>
        <!-- springboot boot web -->
        <dependency>
            <groupId>org.springframework.boot</groupId>
            <artifactId>spring-boot-starter-web</artifactId>
        </dependency>


        <!-- springboot boot test -->
        <dependency>
            <groupId>org.springframework.boot</groupId>
            <artifactId>spring-boot-starter-test</artifactId>
            <scope>test</scope>
            <exclusions>
                <exclusion>
                    <groupId>org.junit.vintage</groupId>
                    <artifactId>junit-vintage-engine</artifactId>
                </exclusion>
            </exclusions>
        </dependency>
    </dependencies>

</project>
3 부분을 추가했는데
springboot parent
springboot boot web
springboot boot test
위 소스에서 해당 주석에 있는 내용을 추가했다.
이제 자식 모듈(admin)에서도 적용되어있는지 확인한다.
import org.springframework.web.bind.annotation.GetMapping;
import org.springframework.web.bind.annotation.RestController;


@RestController
public class AdminController {


    public static void main(String[] args) {


        CoreService coreService = new CoreService();
        System.out.println(coreService.hello());
    }


    @GetMapping("/notice")
    public String getNotice () {


        return "notice";


    }
}
스프링어노테이션인 @RestController 와 @GetMapping을 사용했고 문제없이 동작하는 것을 확인하였다.
이제 마지막으로 maven build로 war를 생성해보겠다.
우선 모듈 pom.xml 에 아래 add packaging 내용을 추가한다.
admin/pom.xml
<artifactId>admin</artifactId>
<!-- add packaging -->
<packaging>war</packaging>
4. 빌드
이제 빌드를 수행해본다.
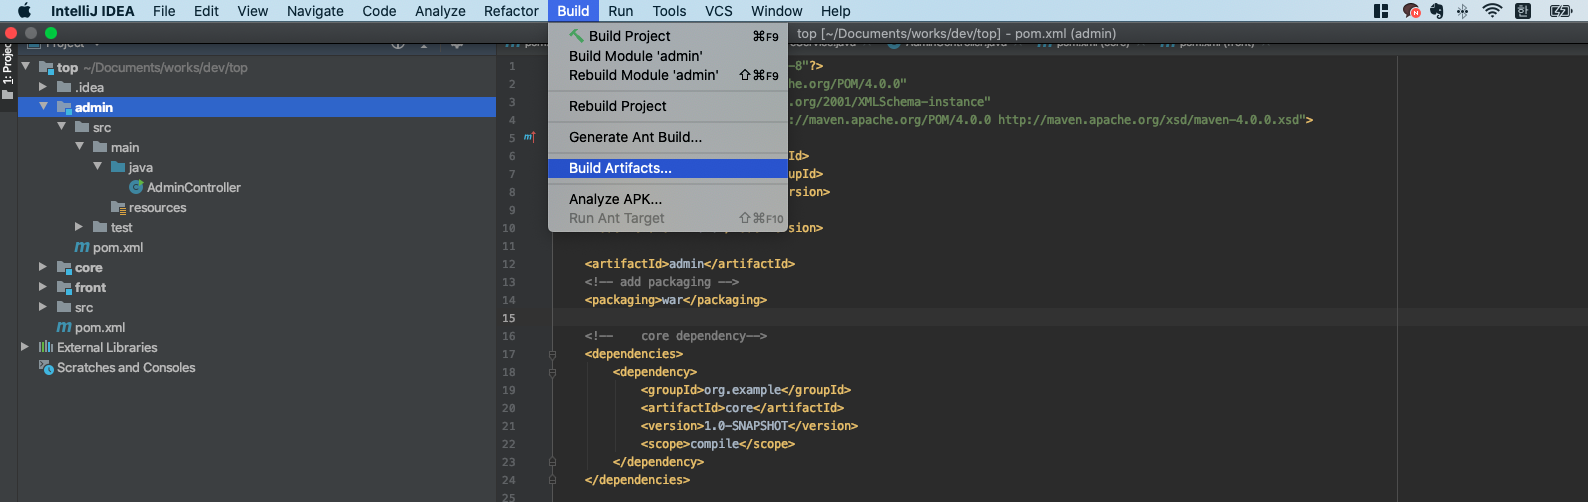
위처럼 Build Artifacts를 선택한 후

admin:war 선택한 후 Build 한다.
트리메뉴를 보면 target 폴더가 생성되어있고
폴더 아래에는 admin-1.0-SNAPSHOP.war 파일이 있다.
admin-1.0-SNAPSHOP -> WEB-INF -> lib를 보면
core.1.0-SNAPSHOT.jar 도 존재하는 것을 확인할 수 있다.
모듈에서 참조하고 있는 다른 모듈은 위처럼 jar 형태로 생성하여 추가되는 것 같다.
이걸로 멀티 모듈을 생성, 배포 파일(war) 생성까지 진행해보았다.
앞으로 멀티 모듈로 개발하면서 생기는 이슈에 대해서는 추가적으로 글을 올리도록 하겠다.